
Beware of These Structural Inspections Tasks You Should Never Miss
Today we have an exciting topic for all the aspiring structural engineers out there. We'll be discussing structural inspections and the importance of conducting thorough assessments.
10/15/20235 min read
Today we have an exciting topic for all the aspiring structural engineers out there. We'll be discussing structural inspections and the importance of conducting thorough assessments.
Before we dive into the inspection checklist, let's understand why structural inspections are crucial. As a graduate engineer carrying out a site inspection, it's your job to ensure the safety and integrity of the building. By conducting a thorough inspection, you will be able to identify potential issues, maintain the longevity of the structure and possibly even prevent failures.
Now, grab your tape measure, your hard hat and safety boots let's go.
First and foremost, review the structural drawings and specifications. Understand the purpose and function of the structure. If it’s a big job, your very first inspections can get overwhelming, especially if you’re doing it by yourself and trust me nothing worse than leaving a site unsure about something you have inspected.

So that’s the reason you have to review the drawings and know in advance exactly what you will be inspecting.
Item number 2: Make sure you bring a copy of the drawings to the site and don’t forget your inspection book so you can write a report and hand it over to the builder. In the inspection report, you will write any rectification works that the contractor has to do before proceeding or if you are happy with the items inspected, you can just say that: All was adequate and approved for whatever it is.
You should also write things like: “Ensure cover is maintained during pour” or “Ensure concrete strength as per drawings”. These are comments that you can always have on your inspection report as standard comments.
What I personally like doing is to colour all inspected items on my Ipad so I know what has been done and what the next inspections will be.


When you get back to the office, you will email the report to the contractor and copy your manager in the email.
Item number 3: Footing Inspection
Inspection of footings generally includes checking the dimensions, cover, reinforcement size, spacing of bars and lap length as I show in the video I posted on Instagram. Ensure that the load bearing element being supported by the footing has starter bars coming out of it.
The bearing capacity of the foundation is usually certified by a geotechnical engineer. Before you head off, say "gooday" to the contractor and make sure he knows all about the concrete strength required as per the drawings.
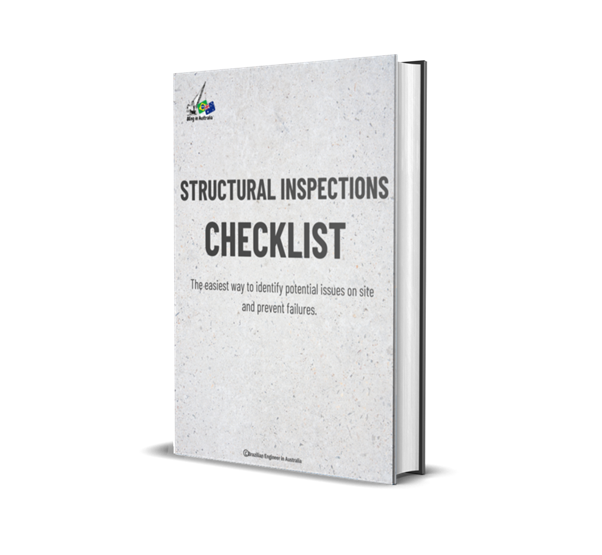
GET MY CHECKLIST EBOOK HERE: https://payhip.com/b/RK9lG

Item number 4: Columns and walls inspection
Firstly, Walk the entire area and check the columns and walls dimensions, and the main reinforcement. Then, on your way back, check the spacing of bars and lap lengths. Make sure the starter bars sticking out for the next level above have enough lap length.
Don’t forget to check the cover. It must achieve the minimum cover, but remember that too much cover can be problematic for crack control.
Item number 5: Suspended Slab inspection
Firstly, walk the entire area checking the supports and edge connections. Ensure all the columns and walls supporting the slab are in place. This may sound obvious, but you would be surprised of how many people get this wrong.
Check that non-loadbearing walls below have not been built as load bearing. So you should be able to see a gap between the slab soffit and the wall.
Walk the entire area again checking the thickness of the slab and the main reinforcement. You may want to check bottom reinforcement first, then top reinforcement. Whatever you find easier to maintain your focus.
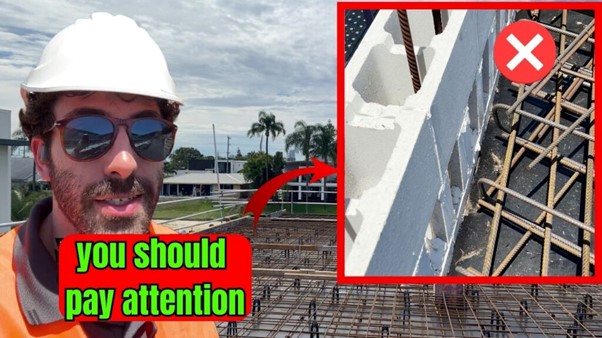
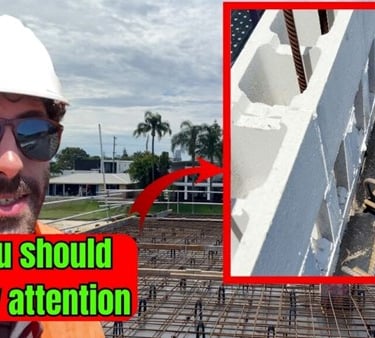
If there are columns and walls over, check that the starter bars are suitable. Ensure adequate cover can be achieved at all locations. If the engineer specified 20mm cover, and you found that on site they have 15mm cover. That’s wrong. Fix it. If they have 25mm. That should be ok. If they have 35 or more. That’s not ok. So again, If it’s specified 20mm cover. No less than 20mm nor much more than 25mm. That’s my rule. If in doubt talk with your senior engineer.
Check the dimensions of beams, reinforcement, ligs, spacing and lapping. If it is a large concrete slab, check the location of the construction joint and if it’s as per the drawings.
And finally have that quick chat with the contractor, ask him how his day is going and what concrete strength he is using.
Item number 6 – Steelwork Inspection
Before you start comparing the drawings to the structure on site, walk the entire area, understand the load paths and check if every structural element makes sense to you. Then you go back again checking the framing and connections.
There are no set rules on how you should do that. The way I find easier is to check one item at a time. Example, I check the columns, base plates and column beam/rafter connection. Then I walk back checking the purlins and girts, lapping, spacing, number of bridging, connection to rafters and columns. I would suggest you doing like that in sections for everything you have to inspect.
Item number 7 – Timber framing Inspection
Personally, I find this one tricky to explain in a quick video, because every builder has a particular way to put a framing together. It’s not uncommon you go from site to site and see different types of tie down or connection.
So for this one you really need to make sure you understand how to design a timber framed house before you go and do a framing inspection by yourself.
Again, there are no set rules, you do it the way you find easier. Personally, I like going from top to bottom.
I check the rafters and trusses, the connections, tie downs, wall framing, which will include studs, tie down, bracing. I make sure the bracing is properly connected to the roof framing. Then I will head downstairs and check the floor framing and connections. I will make sure the bracing walls upstairs are properly connected to the floor framing and all the tie downs upstairs continue all the way to the bottom. Then again, you check the wall framing, bracing walls, floor beams, columns and all the connections.
Item number 8 – Documenting and reporting
Take lots of photos to keep in the company files. Site inspections are a great way for you to learn and see in real life how structures are put together. So always go back to those photos when you can and use them for self-learning.
We touched on the reporting part in the beginning of the post. So again, if you are happy with the inspection, write down on the report the items inspected and that they are adequate and approved or if you’re not happy, state what needs to be fixed.
Write your standard sentences that you should have for all type of inspections, as this will help you cover all the important aspects during your structural assessment.
Remember, each project has specific requirements, so adapt the checklist accordingly.